For experienced tinkerers, this guide only assists with replacing the iPhone’s LCD and touchscreen assembly (the display panel assembly). This requires transferring the original components from the display to the replacement—including the front-facing camera, earpiece speaker, LCD panel, and home button.
For display repairs, it’s crucial to reattach the original home button to the replacement display so that Touch ID (fingerprint) function is enabled.
Step 1:Pentalobe Screws

Before disassembling your iPhone, discharge the battery below 25%. A charged lithium-ion battery can catch fire and/or explode if accidentally punctured.
Power off your iPhone before beginning disassembly.
Remove the two 3.6 mm-long P2 Pentalobe screws next to the Lightning connector.
Step 2: Tape the display

If your display glass is cracked, you can tape the entire screen to prevent injury from glass shards.
Apply tape all over the iPhone’s screen until it covers the entire display.
This will contain the broken glass and maintain structural integrity, making it easier to proceed with this repair.
Wear safety glasses to protect your eyes from any flying glass shards during the repair.
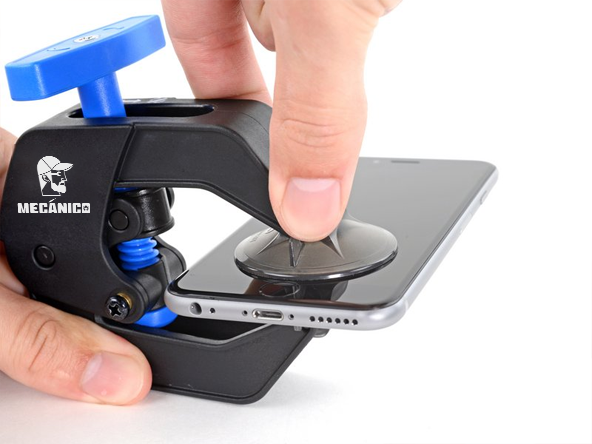
Step 3:Procedure for using reverse clamps

Pull the blue handle toward the hinge to release the reverse clamp from separation mode.
Slide the support arm over the left or right edge of the iPhone.
Apply two suction cups to the screen above the home button—one on the front and one on the back (the front is where the screen faces you).
Press the top suction cup down to apply suction.
If the surface of the reverse clamp feels too slippery or unstable, use some tape to create a firmer grip.
Step 4: Manually open the phone

If you don’t have reverse-grip pliers, use a single suction cup to separate the front panel.
Press the suction cup onto the screen, just above the home button.
Press the suction cup firmly to create a seal.
If your iPhone’s screen is severely cracked, covering it with a layer of clear tape may prevent the suction cup from sticking. Alternatively, use very strong tape instead of the suction cup. If all else fails, you can superglue the suction cup to the cracked screen.
Step 5: Open the phone

Using the top of the screen as a hinge, lift the front panel away from the bottom edge of the display.
Several clips along the top edge will act like hinges.
When reassembling the front panel, align the clips on the front panel with the top edge of the case. Then, slide the front panel toward the top of the screen until its top edge is firmly seated against the rear case.
Step 6: Prying the cable connector

In the following steps, be careful to pry only on the cable connectors, not on their sockets on the logic board.
Use a spudger or a fingernail to disconnect the front camera and sensor cable connector.
Use a spudger or a fingernail to disconnect the home button cable connector..
Use a spudger or a fingernail to disconnect the display cable connector.
Final Step

Remove the front panel assembly from the rear case.