This repair guide will teach you how to replace your
cracked or broken iPhone 6s Plus screen. This includes replacing the front-facing camera, light sensor assembly, EMI shield backing, and home button assembly.
Please note: For Touch ID (fingerprint scanner) to function properly, it is important to transfer the original home button to the new display.
Step 1:Pentalobe Screws

Before disassembling your iPhone, discharge the battery below 25%. A charged lithium-ion battery can catch fire or even explode if accidentally punctured.
Before beginning disassembly, turn off your iPhone.
Remove the two 3.4 mm Pentalobe screws next to the Lightning connector.
Step 2:Complete disassembly steps

Optionally, use an iOpener or hair dryer to gently heat the lower edge of the iPhone for about a minute.
This heat softens the adhesive securing the display, making it easier to open the iPhone.
Step 3

The iPhone 6s Plus‘s display is secured with adhesive around all four edges. If you choose to replace the adhesive, it’s best to prepare new adhesive before disassembly. If you prefer not to replace the adhesive, it’s perfectly functional, as the original adhesive will remain in place.
Apply a suction cup to the lower left corner of the display while disassembling.
If your display is severely cracked, covering it with a layer of clear tape may help the suction cup adhere. Alternatively, very strong tape may be used instead of the suction cup. If all else fails, you can adhere the suction cup to the cracked display.
Step 4

Gently pull on the suction cup until a gap opens between the screen and rear case.
Be careful not to pull too hard and damage the screen. Just open the screen just enough to create a small gap between the display and rear case.
There’s a notch on the underside of the screen, just above the headphone jack. This is the best spot for prying.
While still holding the suction cup in place, insert the flat end of a spudger into the gap between the screen and rear case, just above the headphone jack.
Step 5

Use a spudger to push the edges of the gap open, separating the screen from the phone.
While pulling up on the suction cup, insert the flat end of the spudger into the gap between the screen and rear case on the left side of the phone.
Insert the flat end of the spudger into the gap between the front panel and rear case on the left side of the phone.
Slowly move the spudger to the right, along the bottom edge.
Step 6

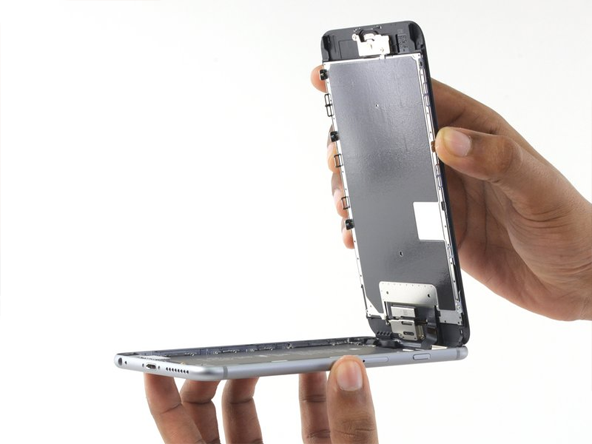
Using the top edge of the display as a hinge, gently lift the display upward.
Raise the display to about a 90° angle, supporting it against something while you work.
Do not open the display more than 90°, as it is connected to three display cables. Excessive opening can damage these cables.
Use a rubber band to secure the front panel to a support. This prevents strain on the display cables.
Step 7

Remove the five Phillips screws shown in the picture.
Three 1.3mm screws
One 1.6mm screw
During reassembly, pay special attention to the 3.0mm screw, which must be tightened in the top right corner. Misplacement can damage the logic board.
One 3.0mm screw
Step 8

Please pay special attention to this step. Disconnect only the cable from its socket; do not pry it off the logic board.
Use a plastic opening tool to disconnect the front camera and sensor cables from their sockets and separate them from the logic board.
Use a plastic opening tool to disconnect the sensor cable connector and separate it from the logic board.
Step 9

The display assembly can now be completely separated from the rear case.
During reassembly, if you have new adhesive strips, remove them first before reapplying them.