Learn how to replace your iPhone 8 Plus screen. This part already has the front-facing camera, earpiece speaker, and EMI shield installed for easier repair. If your screen doesn’t come with these pre-installed, follow this guide instead.
All you need to do is remove the old screen and transfer the Home button to the new one so that Touch ID can function.
Note: If your iPhone’s Auto-Brightness feature stops working after a screen repair, make sure your iPhone is updated to iOS 12 or later. Even with a genuine Apple screen, True Tone will be disabled after the replacement.
Step 1:Pentalobe Screws
")
Before beginning, discharge your iPhone battery below 25%. A charged lithium-ion battery can catch fire or explode if accidentally punctured.
Power off your iPhone before beginning disassembly.
Remove the two 3.5mm Pentalobe screws at the bottom of the iPhone.
Opening the iPhone’s display will compromise its waterproof seals. Prepare new sealant. Reassembling your iPhone without replacing the sealant will render it spill-proof.
Step 2
")
Position the suction cup halfway up the front panel, just above the home button.
Be sure the suction cup does not overlap the home button, as this will prevent a seal from forming between the suction cup and the glass.
Step 3
")
Pull firmly on the suction cup, continuing with pressure to create a small gap between the front panel and rear case.
Insert a spudger or other prying tool a few millimeters into the gap.
The watertight adhesive holding the display in place is very strong; creating this gap requires considerable force. If you’re having trouble creating a gap, continue heating the phone and gently rocking the screen up and down to weaken the adhesive until you create enough of a gap to insert your tool.
Step 4
")
Slide the opening pick from the corner of the phone toward the top left corner, moving toward the volume control and silent buttons to separate the adhesive securing the display.
Stop near the top left corner of the display.
Step 5
")
Carefully lift the suction cup to lift the bottom edge of the display.
Do not lift more than 15°, as this may damage the display cables connecting the display.
Step 6
")
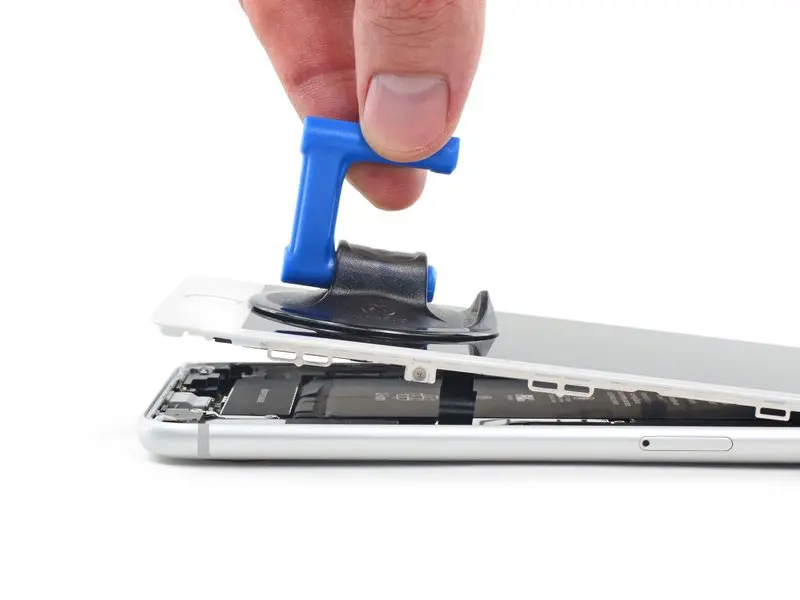
Slide an opening pick around the top edge of the display to cut the last of the adhesive.
Slide the display slightly downward (away from the top of the phone) to separate the clips securing the display to the rear case.
Step 7
")
Gently swing the display up the left side of the phone, like the back cover of a book.
Don’t try to completely separate the display yet, as fragile ribbon cables still connect it to the logic board.
Prop the display against something to keep it propped up while you work on it.
Step 8: Disconnect the battery
")
Remove the four Phillips (JIS) screws securing the display cable bracket to the logic board. They are of the following lengths:
Two 1.3mm screws
One 1.4mm screw
One 2.7mm screw
Throughout this guide, pay close attention to the screw placement so that each screw returns to its original position during reassembly. Installing a screw in the incorrect location can cause permanent damage.
Step 9
")
Use the point of a spudger to pry the battery connector up from its socket on the logic board.
Slightly bend the battery connector up to prevent it from accidentally making contact with the socket while you perform your repair.
Step 10
")
Remove the display assembly.
During reassembly, pause here if you wish to replace the adhesive around the edges of the display.