If your iPhone XS screen is cracked, unresponsive to touch, or doesn’t display an image when you turn on the phone, use this guide to restore your iPhone to working order using a new screen, also known as the display assembly.
The combined earpiece speaker and sensor assembly affixed to the back of the display is factory-paired with your iPhone, so you must transfer it from your old display to your new one when you replace the display. It contains the flood illuminator, which is part of the biometric Face ID security feature.
Face ID will cease to function if damaged or replaced, so be extremely careful not to damage any of these components during this process. If damaged, only Apple can restore Face ID functionality.
Note: True Tone functionality will be disabled after a screen replacement, even if you use a genuine Apple screen.
Step 1:Pentalobe Screws
")
Before beginning, discharge your iPhone battery below 25%. A charged lithium-ion battery can catch fire or explode if accidentally punctured.
Before beginning disassembly, turn off your iPhone.
Remove the two 6.9mm long Pentalobe screws at the bottom of the iPhone.
Opening the iPhone’s display will compromise its waterproof seals. Have replacement seals available before proceeding. If you reassemble your iPhone without replacing the seals, take precautions to avoid liquid exposure.
Step 2
")
If using a single suction cup, apply it to the bottom edge of the phone, avoiding the curved portion of the glass.
Step 3
")
Pull up on the suction cup with firm, continuous pressure to create a slight gap between the front panel and rear case.
Insert the opening pick between the screen and the plastic frame, not directly into the screen.
The watertight adhesive on the screen is very strong, and creating this initial gap requires considerable force. If you’re having trouble opening a gap, increase the heat and gently rock the screen up and down to weaken the adhesive until you create enough of a gap to insert your opening pick.
Step 4
")
Slide the tab up from the lower left corner of the iPhone along the left side to loosen the adhesive.
Please do not insert the tab more than 3mm, otherwise you will damage the internal components of your iPhone.
Step 5
")
Open the iPhone by swinging the display upward from the left side, like opening a book.
Please don’t try to completely detach the display just yet, as several flimsy ribbon cables still connect it to the iPhone’s logic board.
While you’re working on other parts of your phone, find a support for the screen.
During reassembly, hold the monitor in place, align the clips along the top edge, and carefully press the top edge into place, then push the rest of the monitor down. If it doesn’t snap into place easily, check the condition of the clips around the monitor’s perimeter and make sure they’re not bent.
Step 6
")
Remove the five screws that secure the motherboard connector bracket as follows:
Three 1.0mm Y000 screws
Throughout the repair process, record the exact location of each screw and make sure it goes back exactly to its original position to avoid damaging your iPhone.
One 1.3mm Y000 screw
One 3.7mm Phillips screw
Step 7
")
Use a spudger or clean fingernail to separate the battery connector from the socket on the motherboard.
Try not to damage the black silicone seal surrounding it and other board connections. These seals provide additional waterproof and dust protection.
Let the connector bend gently away from the motherboard in case it accidentally hits the socket and breaks the power outage during repair.
Step 8
")
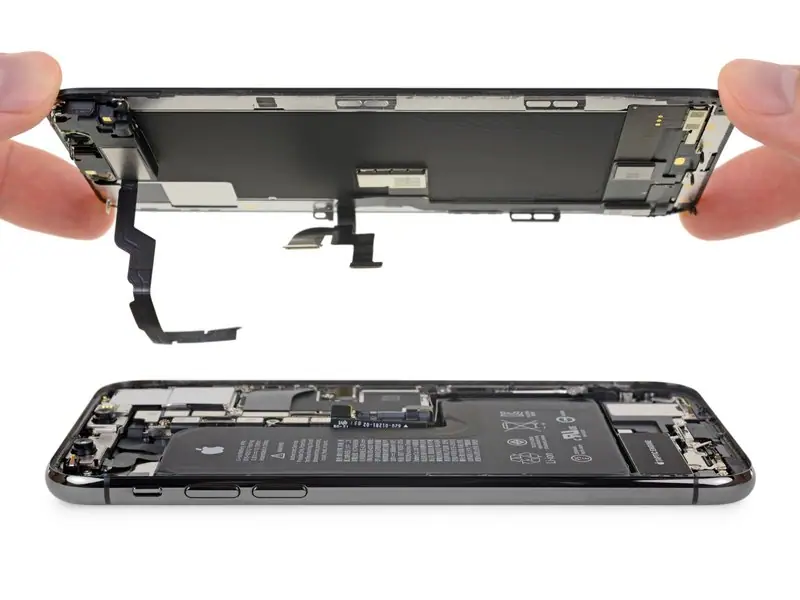
Remove the display components.
During reassembly, if you want to replace the waterproof glue around the edges of the monitor, pause here.