Learn how to replace your iPhone 7 screen. This guide is for complete screen replacement parts only. The part should come complete with the front assembly, earpiece speaker, and installed EMI shield for easier repair.
All you need to do is remove the old screen and transfer the Home button to the new one for Touch ID to work.
Step 1:Pentalobe Screws

Before beginning, discharge your phone’s battery below 25%. A charged lithium-ion battery can catch fire or explode if accidentally punctured.
Turn off your phone before beginning disassembly.
Opening the phone’s display will damage the underlying waterproof seals. Failure to replace these seals will render the phone waterproof.
Remove the two 3.4mm Pentalobe screws at the bottom of the phone.
Step 2: Tape the broken screen
")
If your iPhone’s display is cracked, prevent further cracking by taping the screen with clear tape to prevent damage.
Apply clear tape to the iPhone’s display, covering as much of the display as possible.
This will help contain screen glass and maintain structural integrity when prying and lifting the display.
Wear safety glasses during the repair to protect your eyes from flying glass.
Step 3
")
Apply a suction cup to the lower half of the display, above the home button.
Make sure the suction cup does not overlap with the home button, otherwise it will prevent a seal from forming between the suction cup and the front glass.
If your display is severely cracked, covering it with clear packing tape may help secure the suction cup. Alternatively, you can use very strong tape instead of the suction cup. If all else fails, you can superglue the suction cup to the cracked display.
Step 4
")
Pull up on the suction cup to create a small gap between the display assembly and the rear case.
Insert the flat end of a spudger into the gap.
The adhesive securing the display is very strong, and creating this gap requires considerable force. If you’re having a hard time creating a gap, rock the screen up and down to weaken the adhesive until you can insert a spudger.
Step 5
")
Slide the spudger up the left side of the iPhone, starting at the bottom edge and moving toward the volume control buttons and silent switch.
Avoid prying along the top edge of the phone, as this may damage the plastic clips securing the display.
Step 6
")
Gently pull the display down from the top edge of the phone to release the plastic clips securing it.
Open the iPhone by swinging the display up from the left side, like the back cover of a book.
Don’t try to completely remove the display, as several fragile ribbon cables still connect it to the iPhone’s logic board.
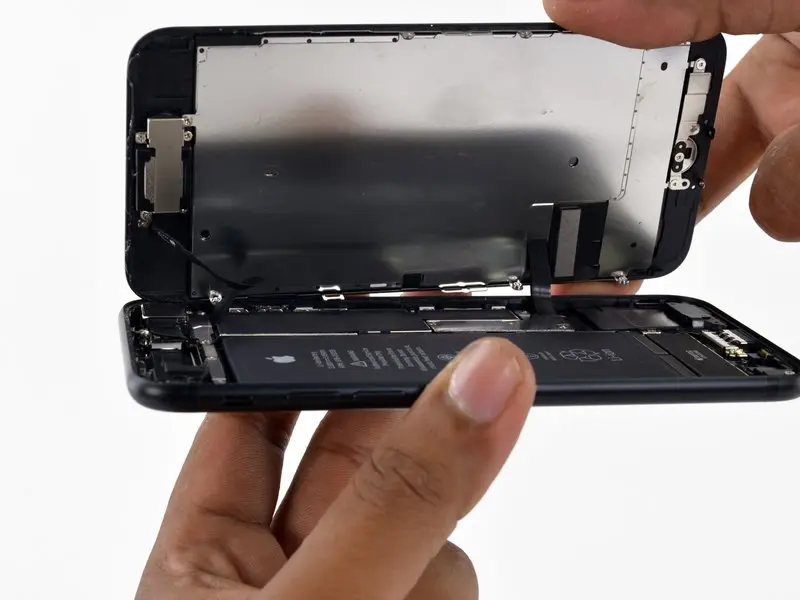
Step 7: Disconnect the battery
")
Remove the four tri-point Y000 screws of the following lengths from the lower connector bracket:
Three 1.2 mm screws
Throughout the repair, use the magnetic pad to mark each screw’s position to prevent damage to your phone during reinstallation.
One 2.4 mm screw
Step 7: Disconnect the battery
")
Before disconnecting or reconnecting the cables in this step, ensure the battery is disconnected.
Use a spudger or fingernail to pry the two display cables out of their sockets on the logic board.
When reconnecting these connectors, press down on one end to secure them firmly in place, then press down on the other end. Do not press down on the center. If the connector is slightly misaligned, it can bend, causing permanent damage.
If, after reassembling the display, the display is blank, displays white lines, or has partial or complete touch loss, reconnect the connectors and ensure they are firmly seated.
Step 8
")
Remove the display assembly.