Learn how to replace the iPhone SE 2020 screen. This part already has the front-facing camera, earpiece speaker, and EMI shield installed, making the repair easier.
All you need to do is remove the old screen and transfer the Home button to the new one to enable Touch ID.
Note: After the screen replacement, the True Tone feature is disabled, even with an original Apple screen.
Step 1:Pentalobe Screws

Before beginning, discharge your iPhone’s battery below 25%. A charged lithium-ion battery can catch fire and/or explode if accidentally punctured.
Power off your iPhone before beginning disassembly.
Remove the two 3.5mm Pentalobe screws at the bottom of the iPhone.
Opening the iPhone will compromise its waterproof seals. Have replacement seals available before completing this step, or take precautions to avoid liquid exposure if you reassemble your iPhone without replacing the seals.
Step 2
")
Position a suction cup against the lower half of the front panel, just above the home button.
Be sure the suction cup does not overlap with the home button, as this will prevent a seal from forming between the suction cup and front glass.
Step 3:Gently lift the screen
")
Pull up on the suction cup with firm, constant pressure to create a slight gap between the screen and the frame.
Stop near the top left corner of the display.
Do not attempt to pry the top edge of the display away from the rear case, as this may damage the plastic clips securing the display to the rear case.
Step 4:Separating the display adhesive
")
Gently pull up on the suction cup to lift the bottom edge of the display.
Do not raise the display more than 15°, as this may strain or tear the ribbon cables connecting the right side of the display.
Pull up on the small nub on the suction cup to remove it from the front panel.
Step 5
")
Starting at the opening below the top left corner of the display, slide an opening pick along the top edge of the phone to loosen the last of the adhesive.
Step 6
")
Gently swing the display up the left side of the phone, like the back cover of a book.
Don’t try to completely separate the display yet, as fragile ribbon cables still connect it to the logic board.
Prop the display against something to keep it propped up while you work on it.
Step 7: Disconnect the battery
")
Remove the four Phillips screws securing the display electronics bracket to the circuit board as follows:
Two 1.3 mm screws
Two 2.8 mm screws
Throughout this guide, pay close attention to your screws so that each goes back exactly where it came from during reassembly. Installing a screw in the wrong place can cause permanent damage.
Step 8
")
Use the point of a spudger to pry the battery connector connector out of its socket on the logic board.
Slightly bend the battery connector cable outward and away from the logic board to prevent it from accidentally making contact with the socket and providing power to the phone during your repair.
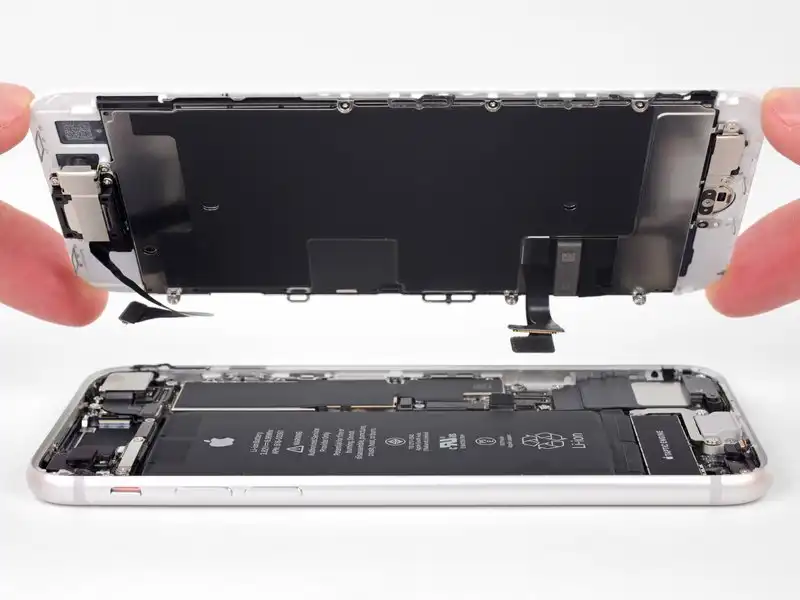
Step 9: Remove the display assembly
")
Remove the display assembly.
During reassembly, pause here if you wish to replace the adhesive around the edges of the display.